Monday, October 20, 2014

Keeping a Clean House---You Can Do It!

The husband and I recently bought at house at the end of the summer. I ended my career working full time at a university and started the adventure of full time mom. Going from a 2 bedroom apartment to a full on house left me overwhelmed with cleaning. Husband and I are clean by nature so I wanted to keep the house clean, but I felt overwhelmed at such a big house. 

Before the feminists go crazy, please know that husband is awesome. And frankly, probably wouldn’t care if I didn’t do a darned thing all day. He always comes home and does what is needed if bottles need washing, or trash needs to go out. It is my personal feeling that as the stay-at-home wife, I should do my best to keep up on the house. There are days where I don’t if we are busy or I’m less motivated, and other days are rocking. I’m not perfect at it, but nor do I feel like my sole job is to keep a clean house.

I decided it would be easiest to break everything down via list. So I wrote down everything that needed to be done for the weekly upkeep:
·         Toilets
·         Showers
·         Vacuuming
·         Floors swept/mopped
·         Counters
·         Sinks
·         Mirrors
·         Sheets
·         Laundry

With kidlet being less than a year old, my cleaning only gets done when he is napping. So I pulled out vacuuming and showers and decided those could be done on the weekend with husband’s help.
Then I picked which days to do what chores. Note: As a stay at home mom of one, I realize this may seem impossible to those with more kids, or where other days are busier. I recommend assigning chores to days they are doable. Or if you have older ones, get their help on some of it- especially their own bathroom.

We have 3 bathrooms but only use 1 regularly. So once a month I clean the other ones  and replace towels etc, but on a weekly basis, I just clean ours. I also did not account for daily things like trash out, dishwasher loaded, etc. Those just happen when they need to.

So here’s the weekly breakdown:
·         Monday: Floors & Laundry  (I sweep every week but mop only every other. For busier households you may need to mop every week. Also our laundry always gets off and most ends up getting done over the weekend. So Monday I make sure it’s all caught up and then throw in a load as needed)
·         Tuesday: Sinks, Counters, Mirrors (kitchen & bathroom)
·         Wednesday: Toilets (as a reward, this is the only one. It’s an easier day, or a catch up day if you missed something else!)
·         Thursday: Dust, change sheets, kitchen counters
·         Friday: fridge clean-out, high chair cleaned, relax or catch up before the weekend (This is more in-depth than the daily clean you might do. I lift up the cover, get all the grime and crumbs that collect, disinfect the tray etc)
·         Weekend or as needed: Showers, Vacuuming
Obviously this is not an end all list. Your home may need more or less chores. Encourage older kidlets to clean their rooms on certain days, or before bed each night. Laundry can be folded with their help, or left on the couch for them to pickup and put away when they get home from school.

Happy Cleaning!

Thursday, December 5, 2013

Stocking Advent Calendar

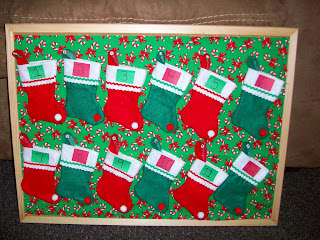
This year I found an idea on pinterest for DIY advent calendar. The original inspiration used baby Christmas socks. Well, baby socks are expensive...especially Christmas socks. And to buy 24 of them is anywhere from $15-$30. So rather than baby socks, I used the mini stockings you can get at Walmart. Again, I am not that crafty, so excuse my amateur materials if you have a machine or material that can make it look better or more professional.

MATERIALS
24 green and red mini stockings (4 pack from Walmart is $1)
Red/White mini pom poms
Tacky Glue
1 sheet of red card stock
1 sheet of green card stock
Bulletin board
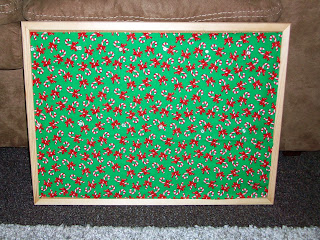
Scrap holiday print material (usually $2-3 at fabric stores)

It's a pretty easy craft to do. Little explanation is needed so I'll let the pictures do most of the talking. 

 I used tacky glue to glue the cardstock on and hot glue for the mini pom poms. 
 Two different scrap materials. I ended up only using 1 of them. 
 A staple in each corner once you have trimmed the material down will suffice to hold it in place. Also, I used clear thumb tacks to hook the stockings on. 
And yes, I am fully aware that there are only 12 stockings. To fit all 24 on would require a huge cork board. My plan is to switch them out after the 12th. This works great if you have little ones or spouses who may try to snitch ahead. To fill the stockings you can do whatever is appropriate in your family. I just bought generic candy and have some fancy chocolate for the 24th.  

Thursday, October 31, 2013

Diaper Bassinet

A relative of mine was having a shower. I wanted to do a diaper cake but wasn't sure if anyone else was planning on bringing one. When I searched the pinterest archives, I unintentionally found directions to make a diaper bassinet. I figured that was safe because then it wouldn't matter if someone else brought a diaper cake. The tutorial I found requires some sewing...and I wasn't about to do that. So I took the general idea and made it into a no-sew, minimal glue gun craft.

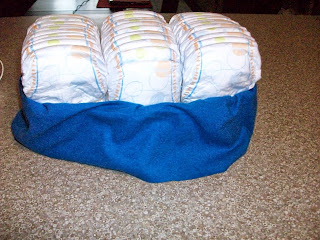
For this craft, you'll need 50 diapers. Any size will be fine, you just want to use all of the same size. Just be aware the smaller the size, the less material you'll need. Rubber band 3 rows of 15 like so:

If you did your math right you'll have 5 diapers left. Roll 4 of them and rubber band them together. I rubber banded them individually and then one larger one. Just do whatever works.  
  
 Taking the last diaper, lay it across as a frame for what will later be the head of the bassinet. 
 Next, take thin rope or twine and tie it snugly around the 3 rows of diapers. You'll use this to tuck in the material into. If you can find a rubber band large enough to fit around all the diapers you can use that.
Next, take your solid color (or print) material that you'll use as a background and tuck it into the twine. For size 1 diapers, you'll need about 40 inches to wrap all the way around. 
Then, place the rolled diapers at one end, and take your 5-inch (roughly) strip of material to cover it. Just tuck the edges into the sides behind the skirt area. 
Next, take the trimming you bought and tuck it into the bed skirt as well. The trimming I bought was about 6 inches. It was just long enough to tuck in and still go down to the bottom. If you wanted to sew it in, you could buy the next size down. 
  
Finally, add a little extra decor to make it fun. In my case, baby's theme was planes, so I bought a little wooden plane and hot glued it to the top of the head of the bassinet.

There you have it. No needles required, and hot glue only if you want to get crazy. To transport, I used a cereal box trimmed down to support the bottom. I've seen baskets used as well. You can also try to make it look more bassinet-ish and cover the diapers with a receiving blanket or a few burp cloths. Your options are essentially limitless in these crafts--which is awesome for us only pretending to be crafty.

Thursday, July 18, 2013

Candy Bouquet

When one becomes an adult, you eventually realize that your parents have countless "Number 1 Dad" mugs, "Worlds Best Mom" hot mitts and endless desk decorations or nick knacks. The challenge then becomes what to get them for holidays that is not always a gift certificate to their favorite restaurant. Since my dad loves candy, I decided a candy bouquet would be perfect. 

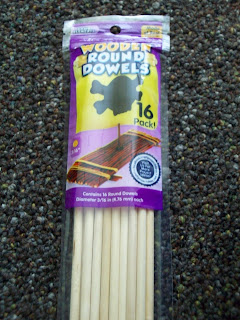
You'll need wooden dowels for this project along with a vase or bucket that is deep enough that the candy won't tip it over. 
 Take the dowel and tape candy to the dowel. For bigger candy bars, you may want to use two dowels, or just extra tape.
 The Hershey's bar and Reeces are doubled up on dowels. My dad loves Red Vines so I put a few pieces in ziploc bags and then taped the bags to the wooden dowels. 
 In the bottom of the vase, put m&m's, or any kind of mini candies as "water" or "soil". Then add in some tissue paper. 
 Inside the tissue paper (because there's not enough sugar already) I added caramel kisses. 
 Then stick your candy dowels down into the "rocks". It will put holes in the tissue paper, but you won't be able to tell until you take the paper out. On the back, I attached some of our favorite memories of growing up with dad that I gathered from my siblings.  

The final product! The vase reads "Happy Father's Day Dad. Thanks for all the 'sweet' memories!"

Monday, April 22, 2013

Vases Gone Vintage

I wanted to use vases as a centerpiece and had tulle and silk flowers to somehow make it look fancy. I looked all over pinterest for ideas because as you've probably read, I'm a little handicapped with creativity. Thanks to Kaitlyn on pinterest, this was my original inspiration:
http://pinterest.com/pin/426434658437039675/

Materials:

  1. Acrylic Paint (2oz bottle)
  2. Sponge brush
  3. Vase(s)
  4. Tulle of your choosing
  5. Gems, beads, or other decorative items to add to your vase-your local dollar store is the perfect place to find these if you don't already have a collection. 
  6. Paint Safe surface (your concrete patio or in my case, paper towels underneath sufficed)
  7. Silk Flower(s)

I believe hers use more of a metal vase but depending on how much you want to paint and the surface look you want, it can vary. I started with glass vases that were older and had a hint of yellow/dinginess to them compliments of my local thrift store and mom's cupboard.
 Acrylic Paint from the local craft store for 60 cents. Pour this stuff in a paper/styrafoam bowl/plate. Then get dive right in with your paint brush and start covering the vase. Don't bother with the bottom of the vase. No one will see it anyways.  
 I did one coat and then added another to make it look less see-through. In my case I used white paint, but whatever suits your fancy. 
 Once the vases are dried and you have achieved the look you want, (at least an hour) use a hot glue gun to stick on gems or beads. 
 You can see mine are not perfectly straight. But these were to be used for a party of young girls, so the only person who noticed was me. Decorate the vase however you want. Depending on the size of gems you buy, larger pieces stick better to the bottom part of this style of vase because of the ribbing in the glass.


The half-way point: The left one was the first vase I did and realized less looked better around the vase. 

 Combining pink and yellow tulle, I folded the 18 inch strips over each other and tied it into a bow around the vase. I am perhaps the worst bow-tier so you may have better luck than.
 The final product:
Like I said at the top, they definitely did not turn out like the one on pinterest. But the roughed edges gave it more of an elegant vintage pottery look. I'd suggest you be generous with the amount of paint you use if you want it to look more smooth. 

The final product on a decorated table: 

Napkin Rings

I needed napkin rings as a table accessory for my business (tinyelegance.com). My business partner and I did searching online and created these from scrap materials. 
  
Materials needed:
  1. Paper towel rolls. Don't use toilet rolls....they are much more flimsy!
  2. Felt cut into 1 1/2- 2 inch strips (amount depends on your ring width)
  3. Ribbon (Ribbon pictured above is satin with a silver trim)
  4. Clear strand of beads
  5. Glue gun/glue sticks. For such fine work, my mini glue-gun conquered this project like a boss!
  6. Flower heads (Just buy flowers from the dollar store. You will pay much more otherwise)
d
Directions
  1. Cut the paper towel into about 2 inch circles. I suggest discarding any that are creased. You will regret it later
  2. After cutting the felt into a matching length, use the hot glue gun to glue it around the paper towel roll. Just doing a few lines of hot glue lengthwise is plenty. I did about 4 evenly spaced. Make sure the felt is long enough to overlap just a bit. Use the overlapping felt as the back of your napkin ring.  
  3. Next, cut the satin ribbon so that it is just long enough to fit around the felt-covered paper towel ring. Use tiny dots of hot glue to glue it around as well with the ends on the front half. 
  4. Repeat step 3 using beads. 
  5. Cut off a flower head of your choosing. You'll want the back of the head to be as flat as possible with very minimal stem but enough of the green stemming so you don't have to glue the petals at all. 
  6. Glue the flower head on with a medium sized dot of glue and press the flower on for about 5 seconds. 
  7. You'll want to wait for the glue to set and then pull off those annoying hot glue strands. :) 
If you are careful and don't have a huge glue gun, this can actually be a burn-free glue gun project!